In these difficult times, we see an increase in Teams usage. For some users, this is a new experience, and it is important to help them out. I see a lot of people and companies hold webinars for helping out. This is good and drives user adoption.
But in Teams, there is also possibilities to create some self-service for questions, for example by using a chatbot. I thought I’d provide a quick guide on how this can be accomplished.
If you get a lot of questions, you can gather them in a FAQ. The same FAQ can be used in a bot, to provide user the possibility to ask a question, either in a chat or in a channel.
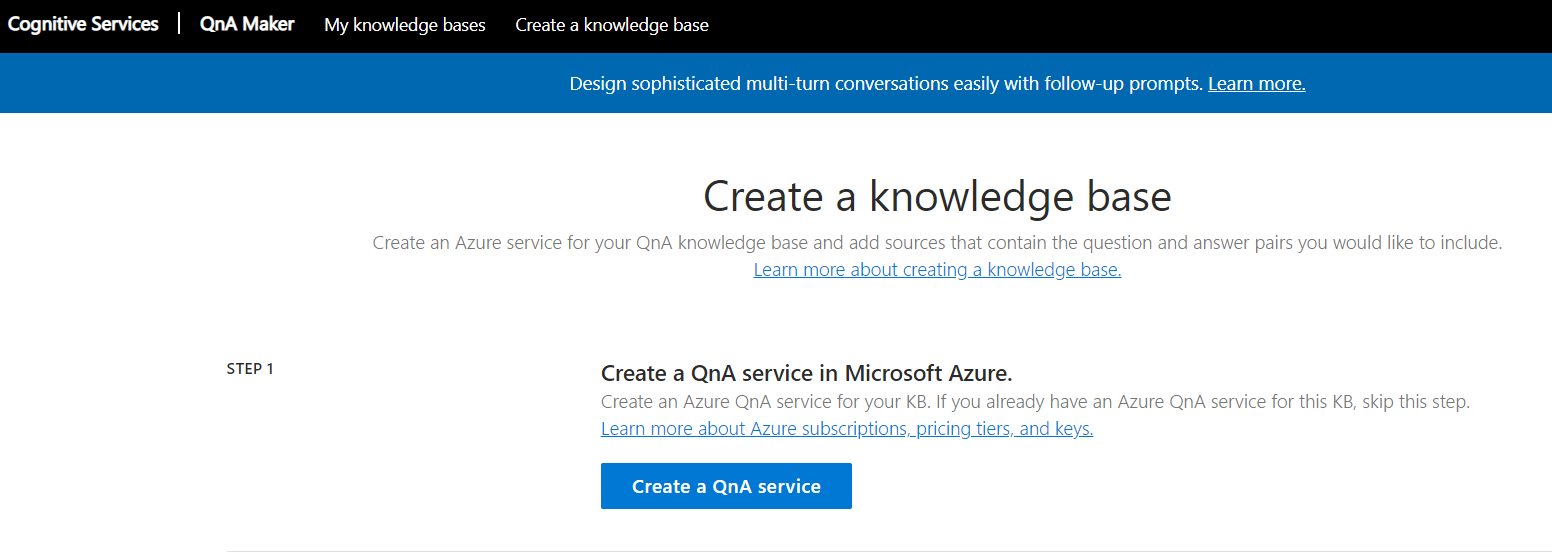
I started of by opening QnA Maker
Here I selected Create a knowledge base, and then clicked Create a QnA service.
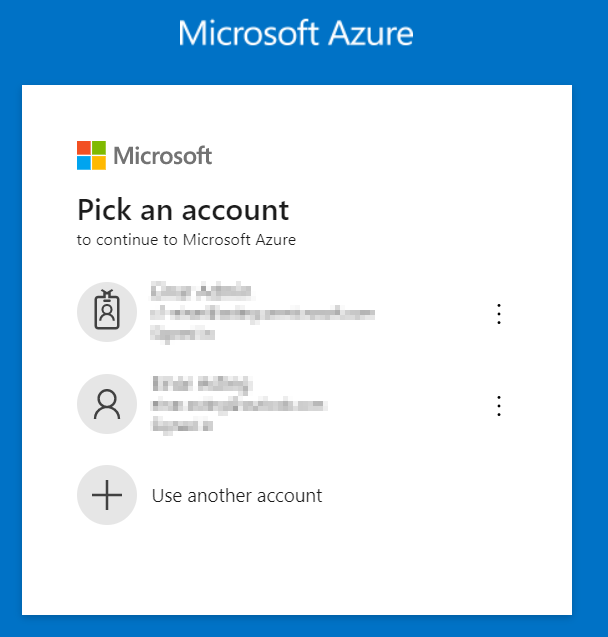
I signed in with an Azure admin account
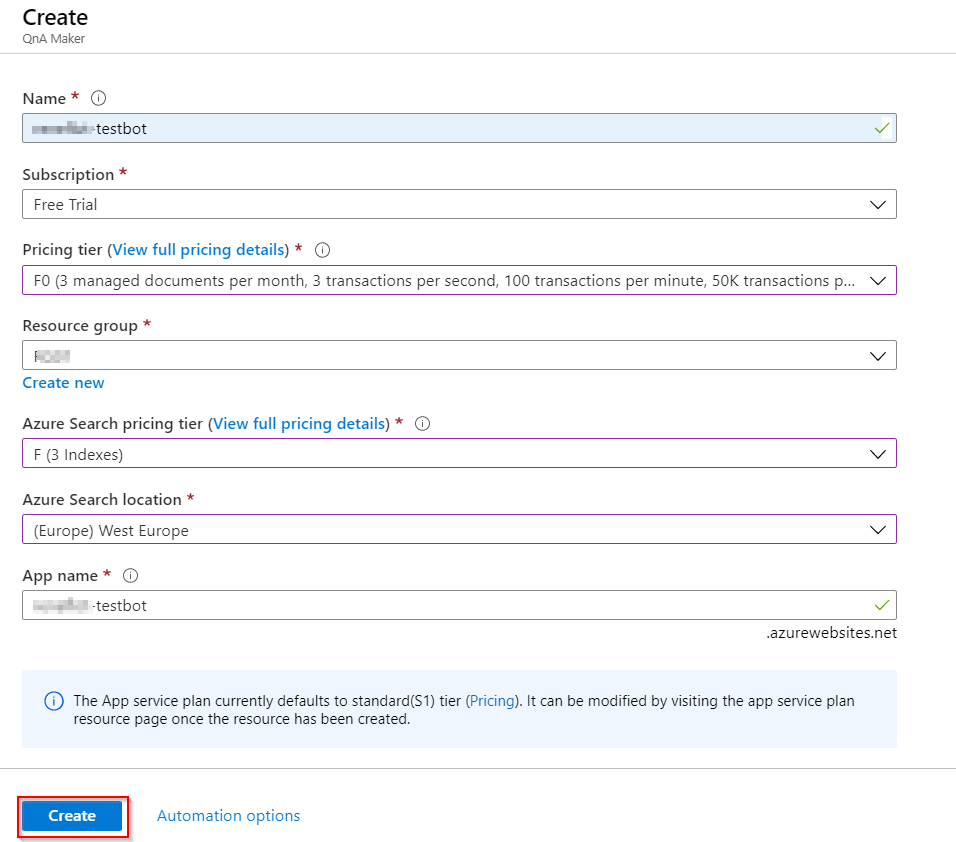
I then was presented with a wizard. Fill in Name, select Subscription, Pricing tier (free), resource group (I used an existing). Also select Azure Search pricing tier (free) and where the search location will be. I gave the same App name as the Name. Click Create to continue.

After a few minutes everything is created for you. Continue in QnA Maker by following Step 2.

Click Refresh to populate the required fields with the new QnA service.
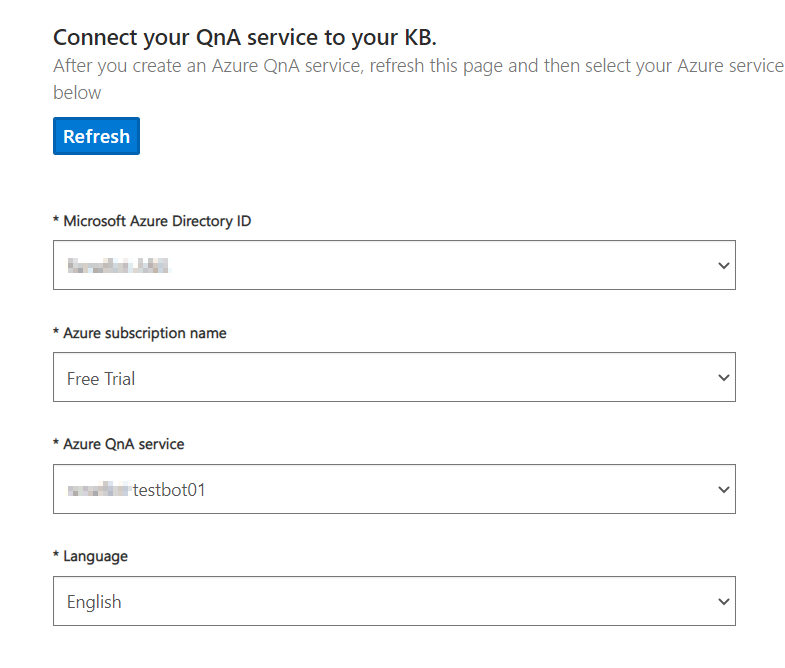
Select you Azure tenant, your subscription and the newly created Azure QnA service. Then select your language. I chose English, as I would create an English KB.

In step 3, name your KB. This can be changed at a later stage.
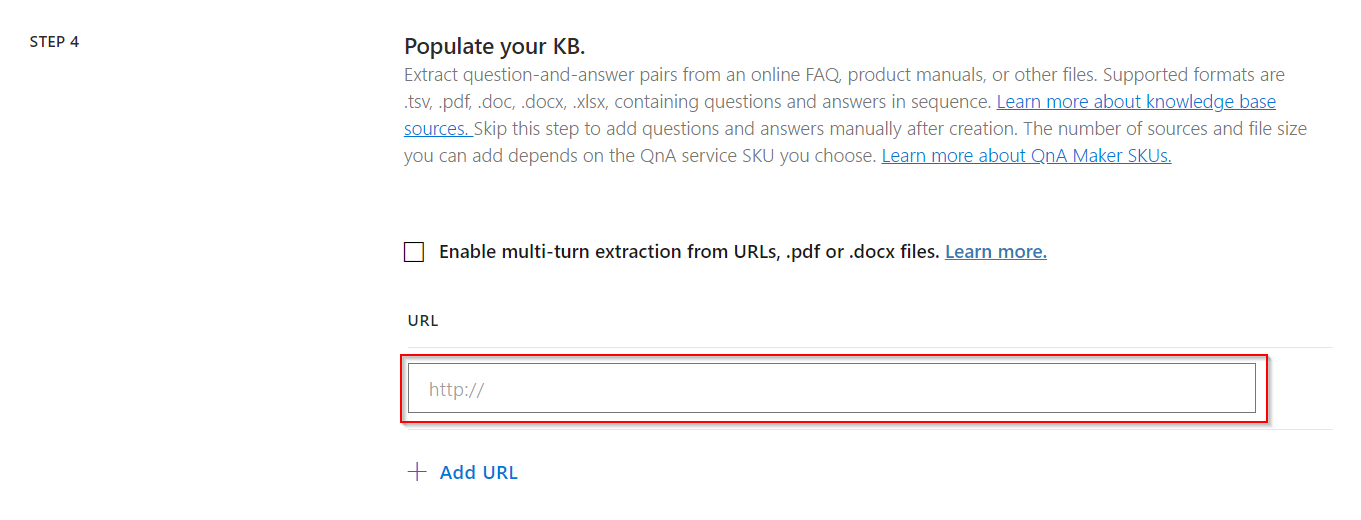
Step 4 will ask you to populate your KB. If you want to manually create questions and answers, skip this step. I added this URL for this test (top 10 Teams questions) but you can create and use your own if you already have it: https://techcommunity.microsoft.com/t5/microsoft-teams-blog/top-10-microsoft-teams-questions-from-customers-around-the-world/ba-p/377067
Remember that the format has to be in sequence, with question and answer, question and answer etc.
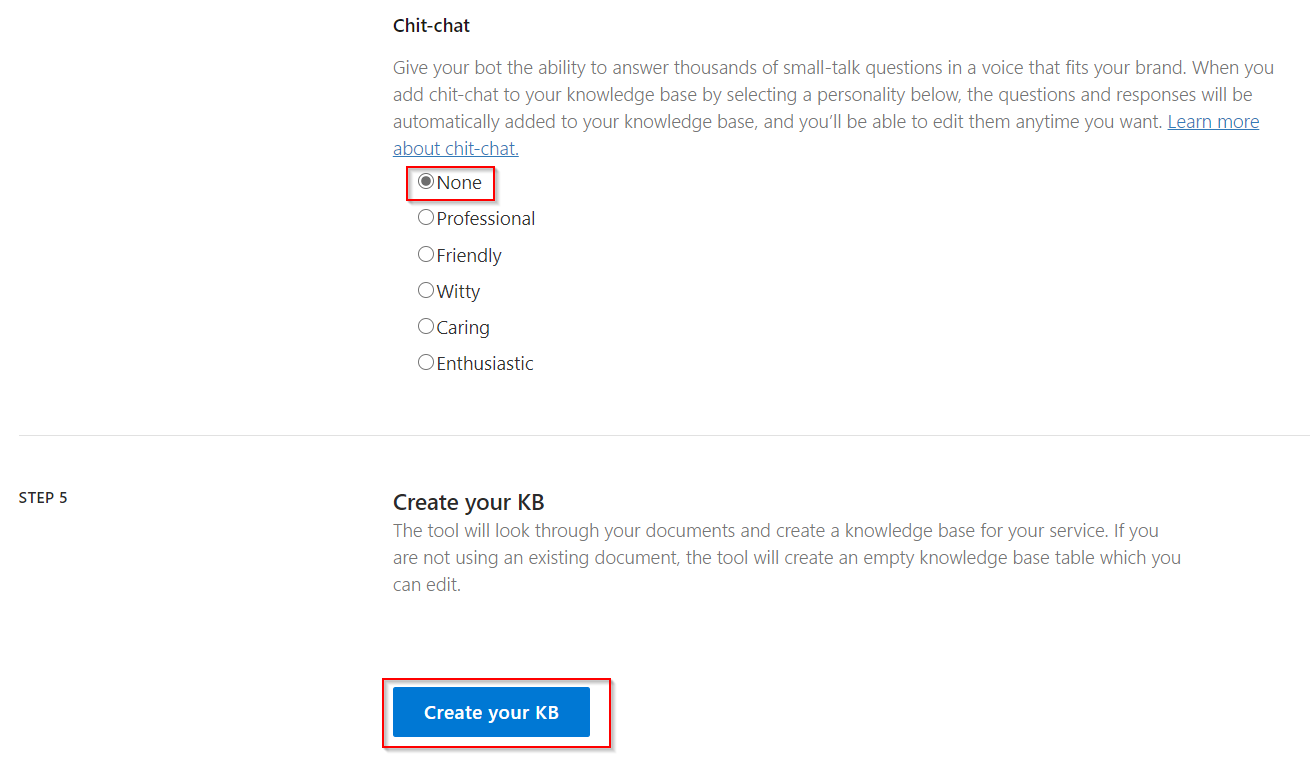
If you want to have Chit-chat enabled, select a personality. I dropped this for now. According to Microsoft, “Adding chit-chat to your bot makes it more conversational and engaging”.
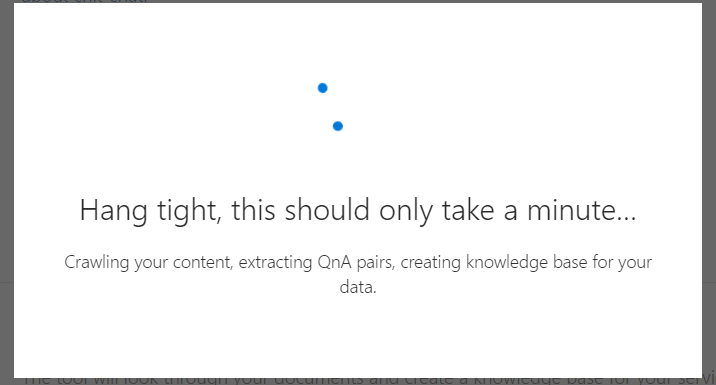
Click Create your KB. It will take a few minutes, depending on the amount of questions and answers.
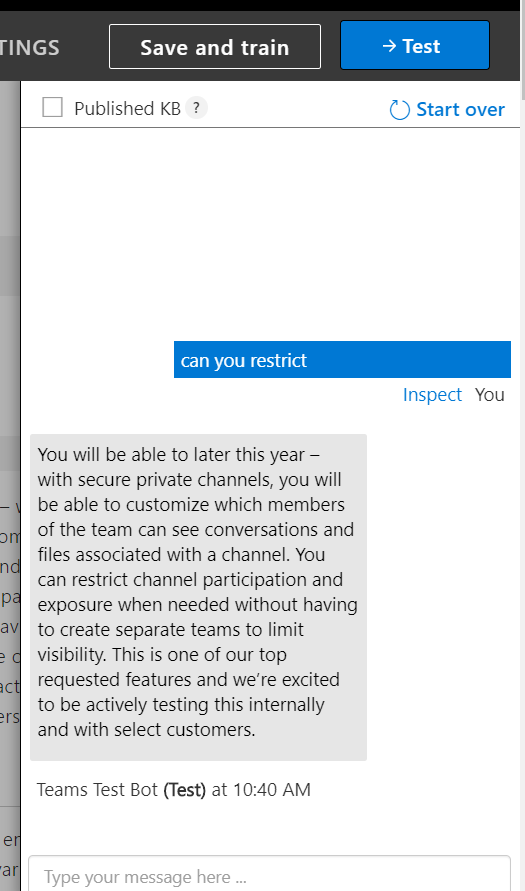
Once completed, you can test your KB. Fill in a question from the FAQ and verify that it works.
Once you’re happy, click Save and train.
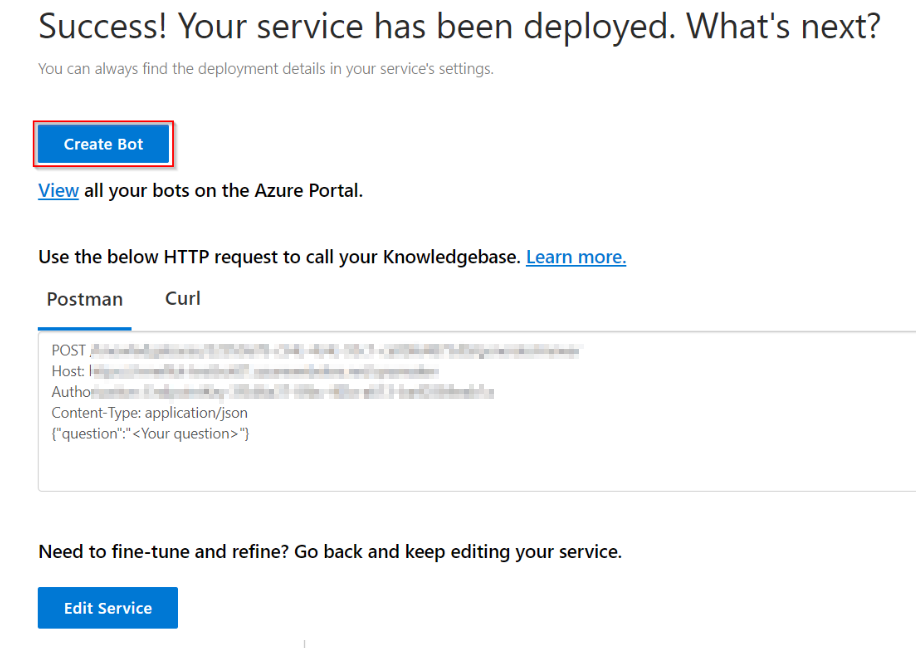
Click Create Bot
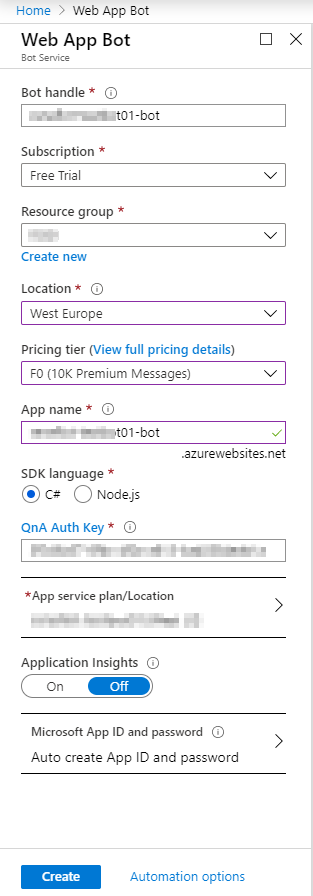
You will be prompted for setting up the Web App Bot. Fill in the fields.
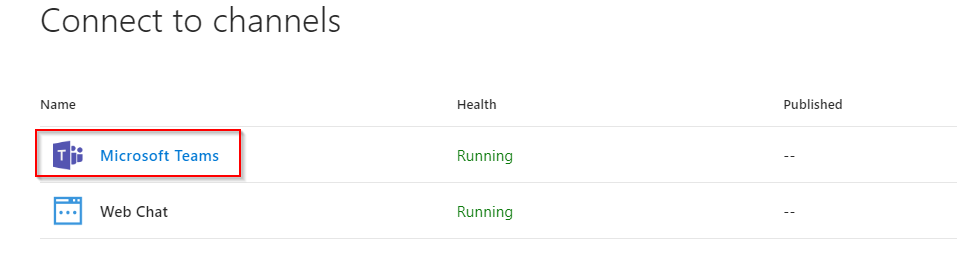
Once completed, go to Channels and select Add a featured channel, then Teams.
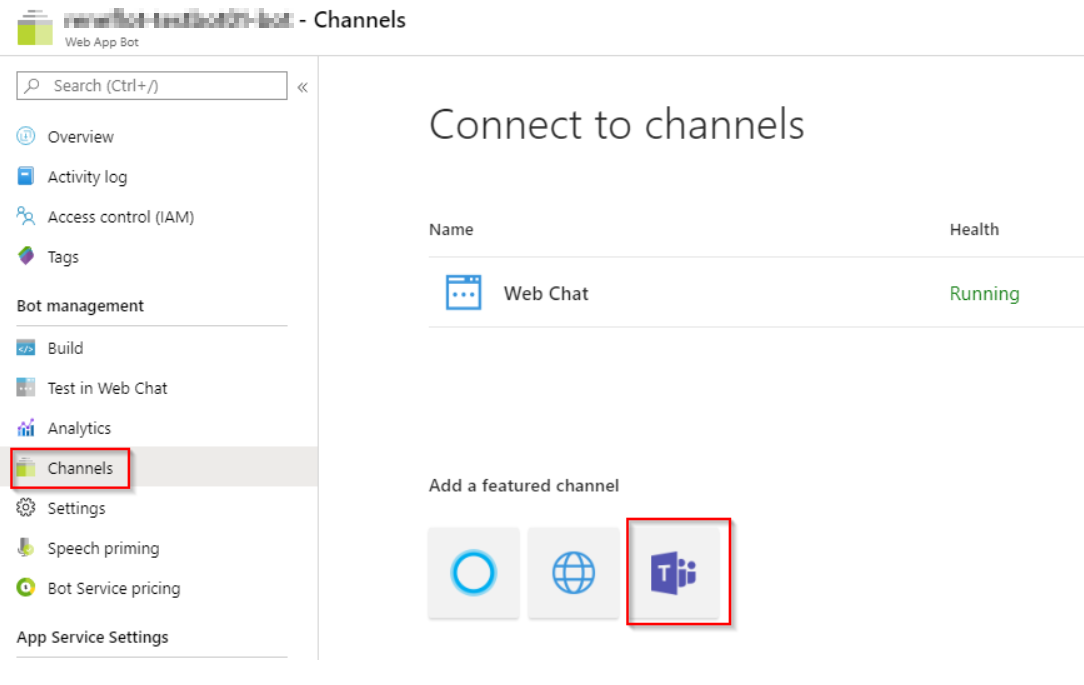
Verify that the channel is Running
Go to App Service Settings, and select Configuration.
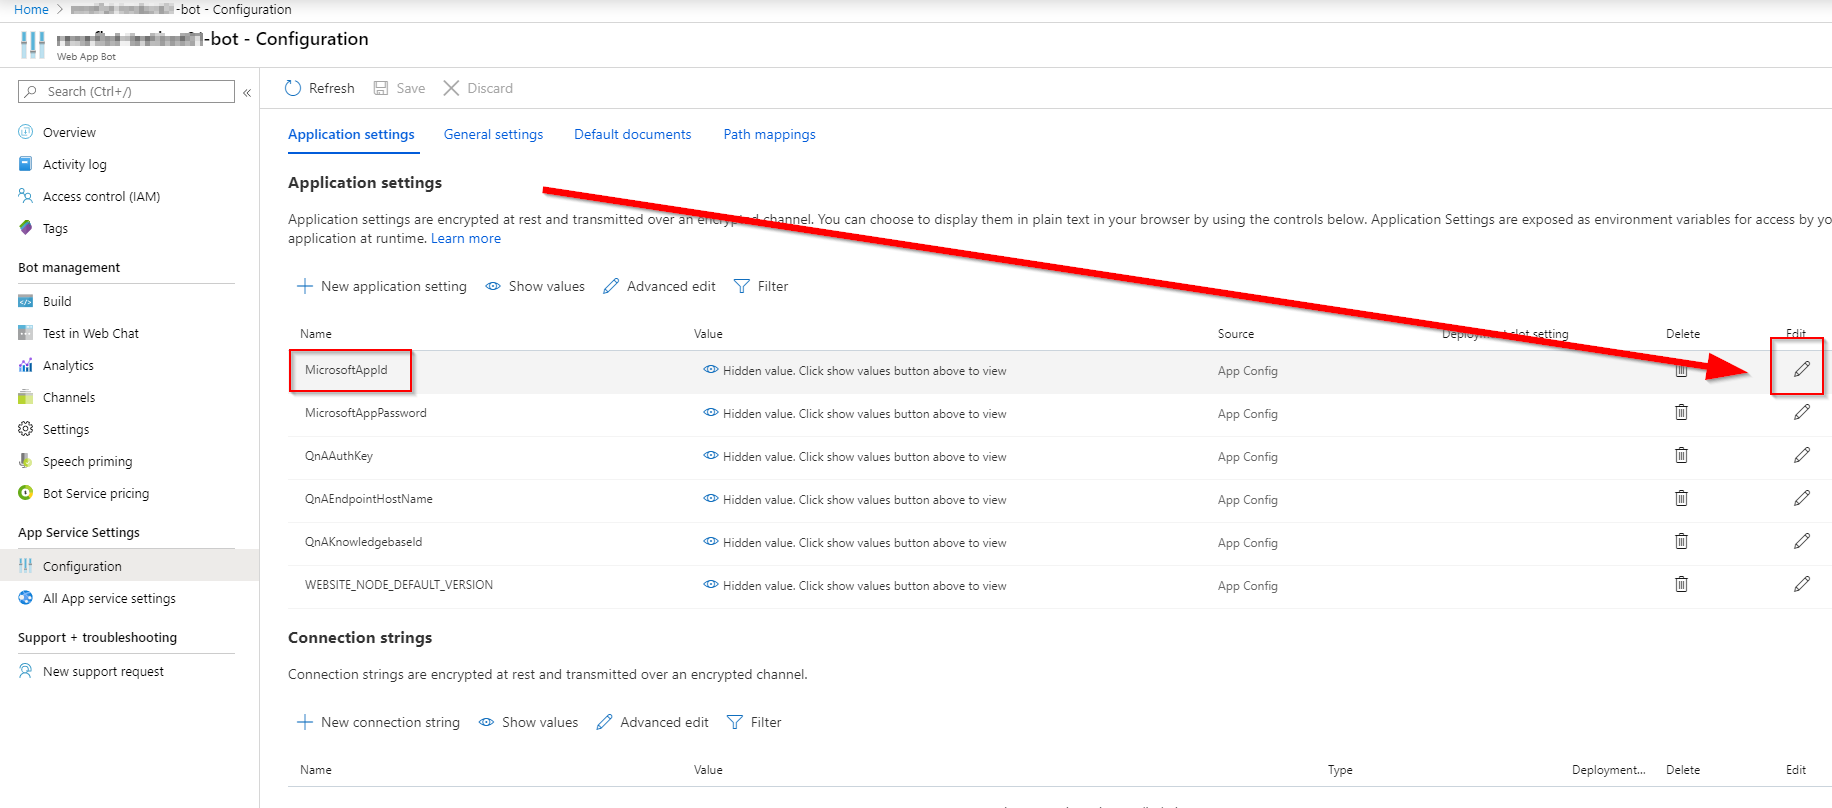
Click Edit on MicrosoftAppId, and copy the Value. We need that later.

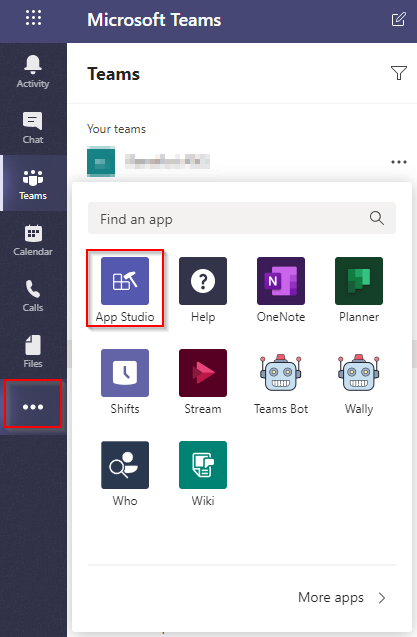
In Teams, install App Studio if it is not already there, and start it.
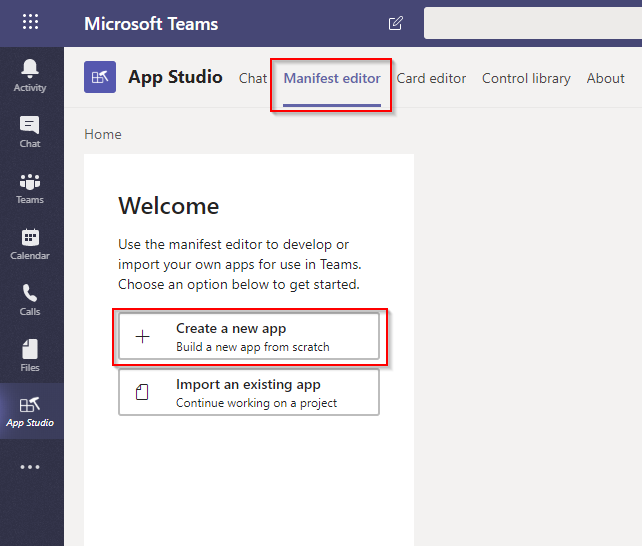
Click Manifest editor, and select Create a new app.
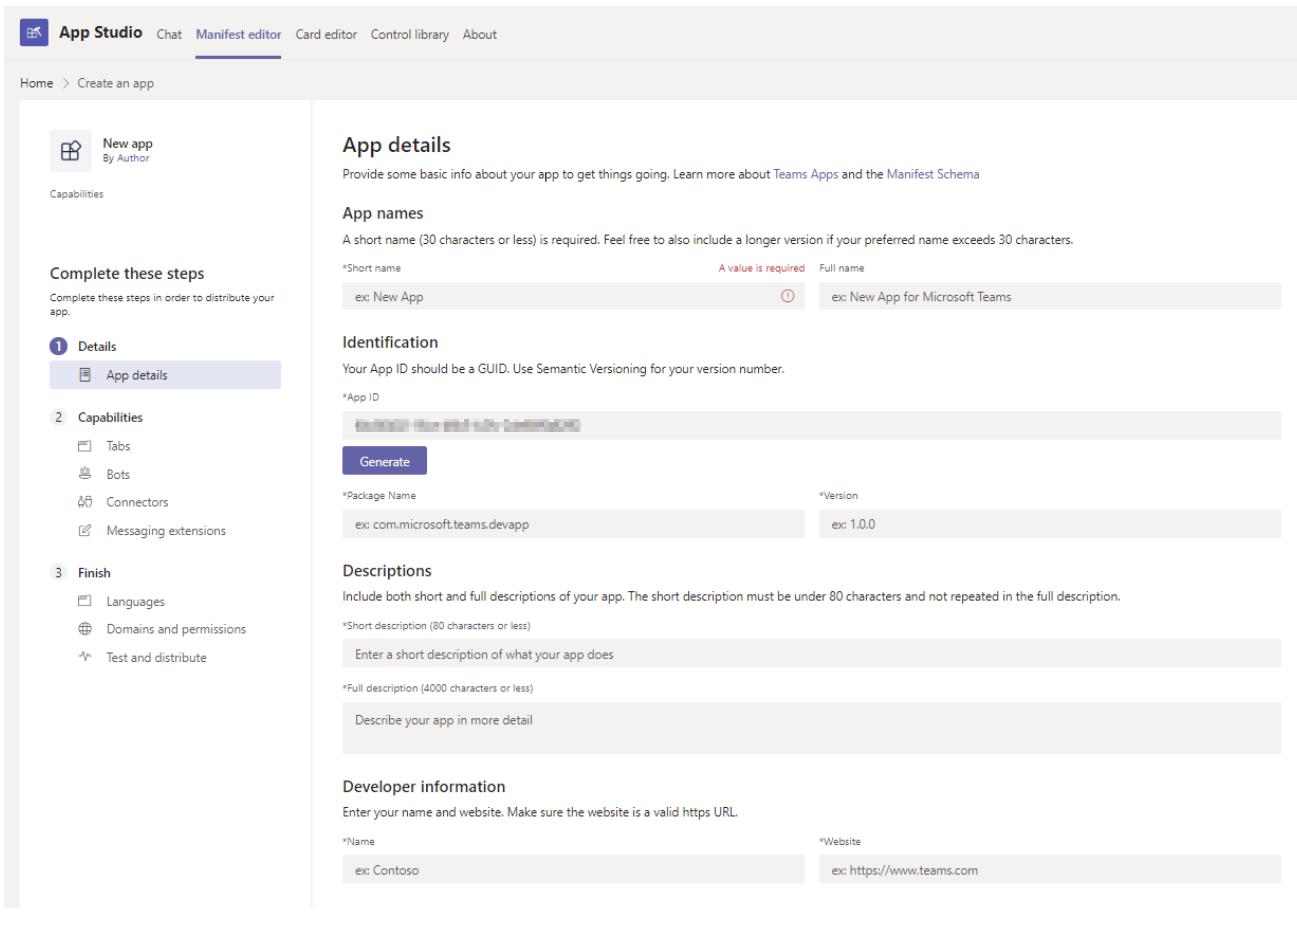
Fill in App details, most are self-explanatory. Click Generate to get an App ID.
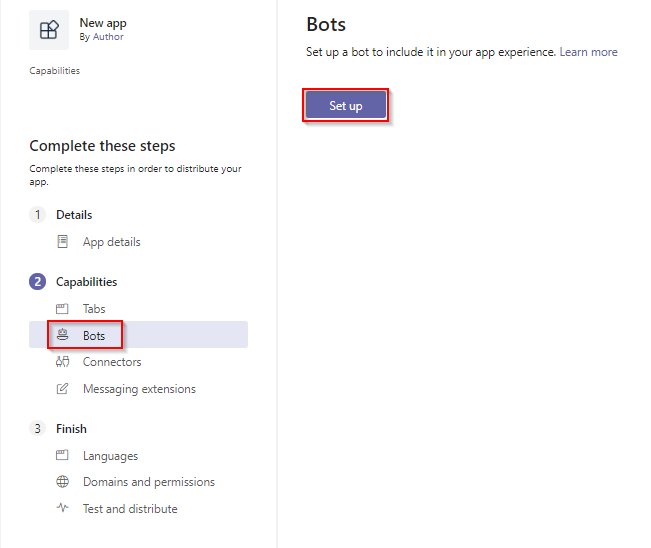
Under Capabilities, select Bots, and Set up.
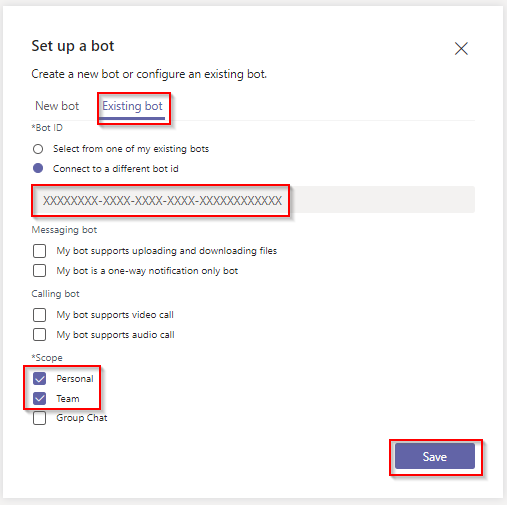
Select Existing bot, copy in the value from MicrosoftAppID above.
I selected scope to be Personal (chat) and Team (channel). Click Save.
Go to Finish and Test and distribute. Here you can either Install the app, or Download it.
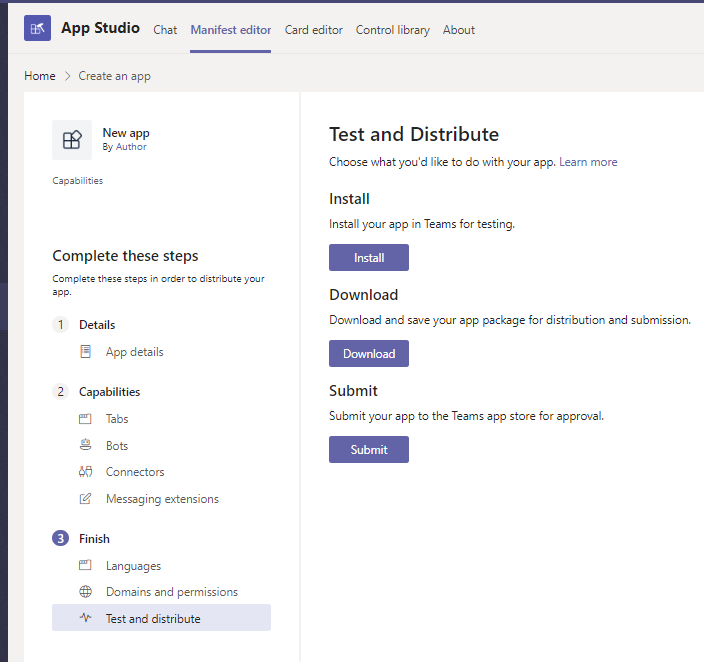
If the install fails, download the app package.
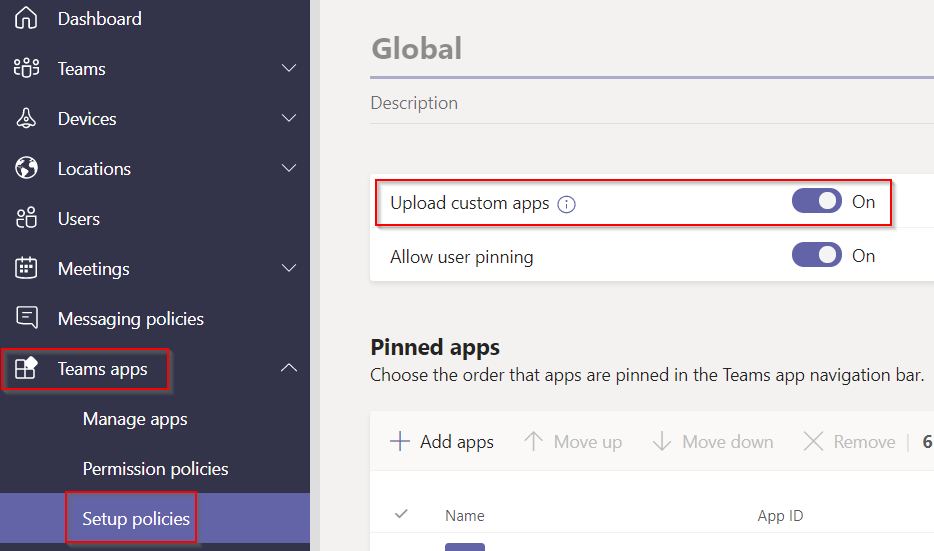
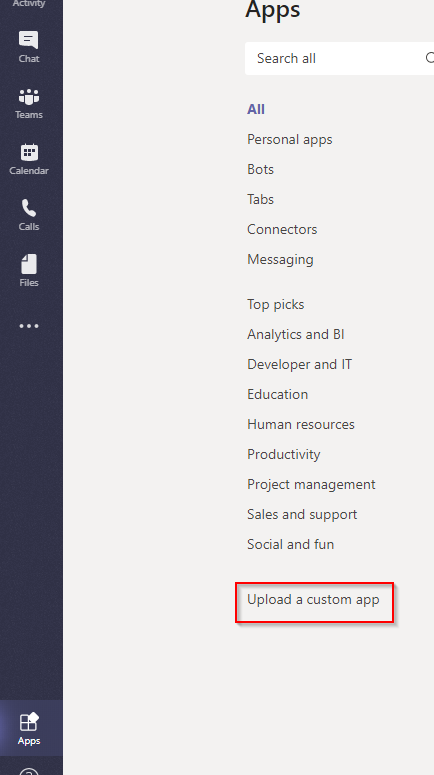
Then go to your Teams admin center, and allow side loading of apps, under Teams apps, Setup policies, and set Upload custom apps to On.
After a while, you will see the choice to Upload a custom app. Click it.
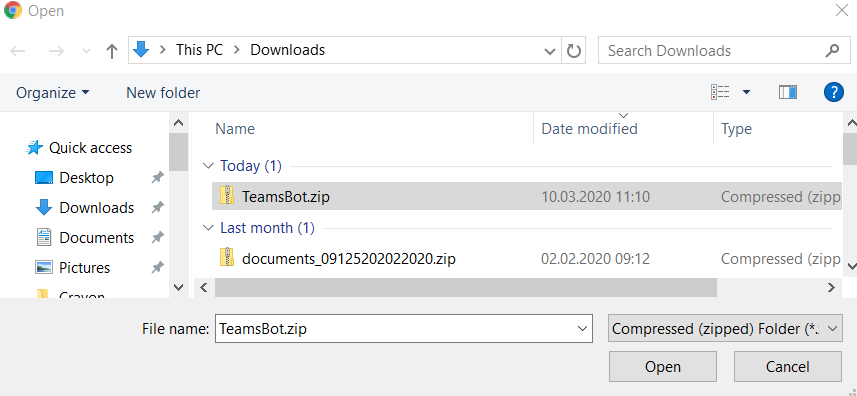
Select the package you downloaded.
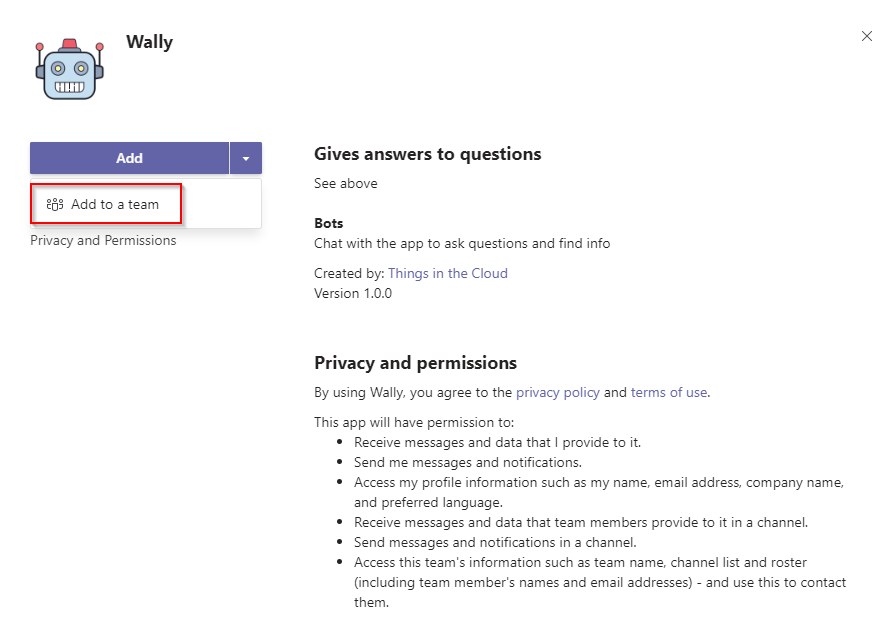
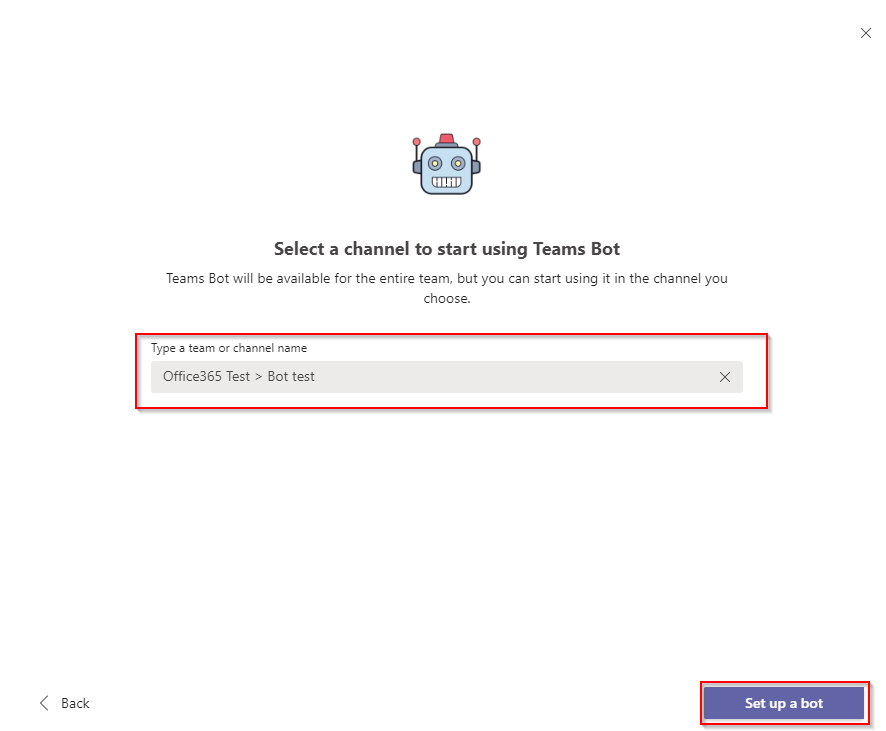
Click Add to a team
Select the channel you want to publish your bot to.
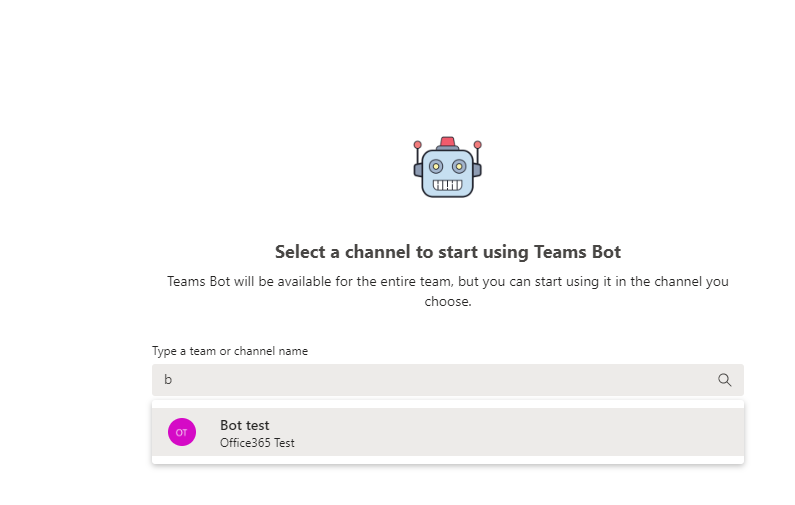
Click Set up a bot.
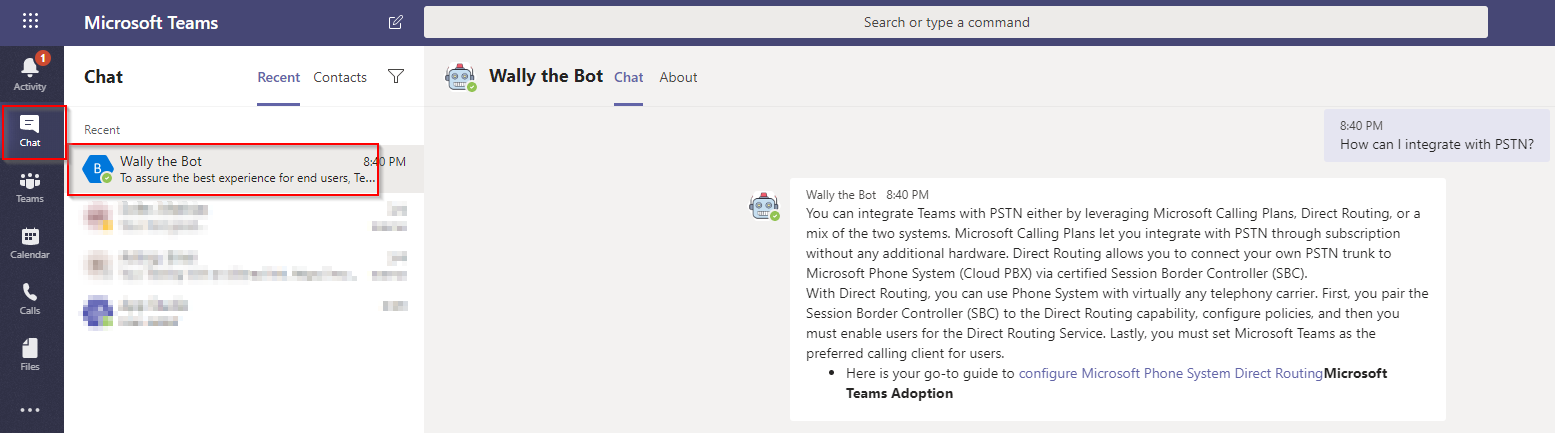
Your bot is now available in Teams.
You can ask a question in a direct chat with the bot
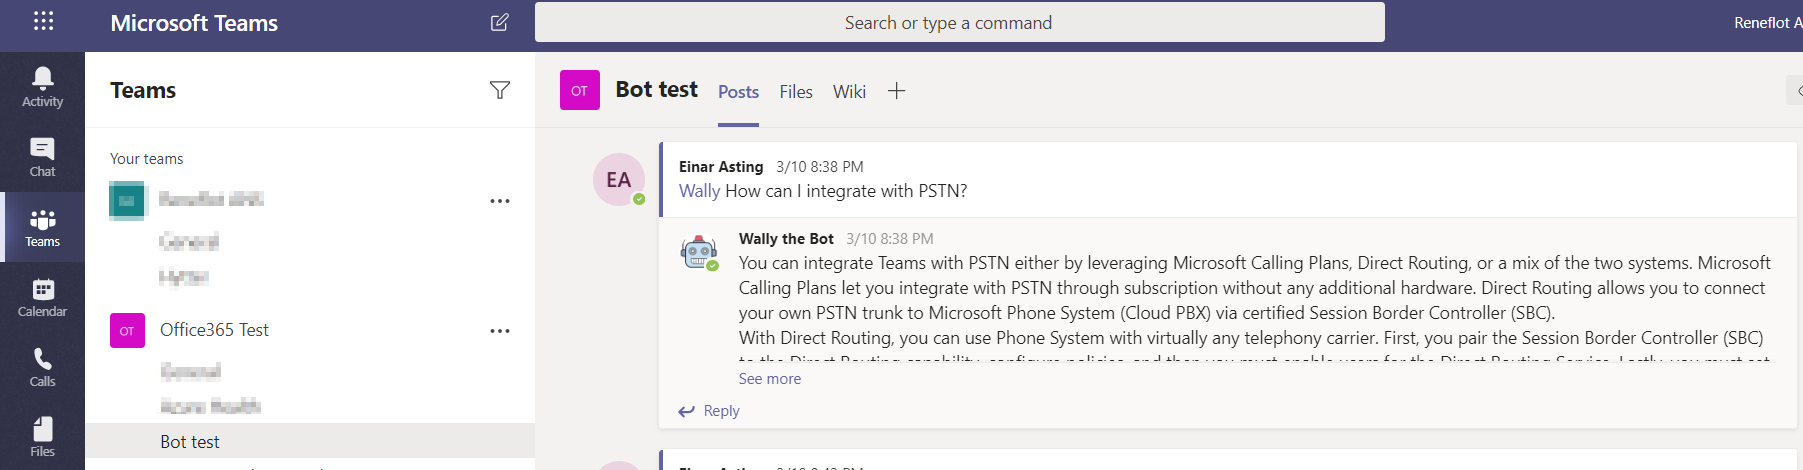
You can also ask a question in the channel, by at mention the bot, then ask the question.
Now we have a working bot in Teams that can answer any type of question you have in your KB. You can now develop it further, adding multi-turn questions etc.